Showing posts with label My Favorite Stamps. Show all posts

11.16.2015

Blog Named Hero Blog Hop // Hero Arts

Today the Hero Arts blog is hopping with A Blog Named Hero!


I had so much fun making this little scene - I can't seem to stop using this wreath stamp! One of the things I love about this multi-step stamp set is that you don't have to stamp every layer. I've already made several cards with this wreath stamp set, and I don't think I've used the second or third layer yet!


I added some glitter to the wreath - this was one of the last things I did to the card, and I was going for more of a snowy glitter look, but I didn't want to have too many textures going on in the card, so I left it at this more translucent glitter.


Again, I used my ombre ink for the wreath, and it adds such a nice little touch. When I use the Hero Arts ombre ink, I have a special way of doing it.
Basically, when I use the ombre ink pads, not only do I do the little stamp "dance" recommended on the Hero Arts website (which is moving your stamp up and down the pad to get a more even ombre look), but I really ink up my stamp.
I press my stamp pretty firmly against the ink pad until I'm sure it's completely covered with ink, then I lightly tap it against the ink pad to even out the ink and prevent the ink from pooling on any particular spot on the stamp. It is especially important to do this if you're stamping on vellum, because the more ink you have on your stamp, the easier it is to slide and smear on the vellum. 


I don't have the brick stencil background, so to create my brick background, I first embossed my brick die into the red cardstock, then I used the die to cut into a piece of thin transparency. I used this transparency as a cheap stencil, and added some more red coloring to the bricks using some Distress Inks. This is a great way to stretch your dies - use them as stencils!

Giveaway - Hero Arts stashed away THREE of the November 2015 My Monthly Hero kits to giveaway to readers of this hop. The winners will be randomly chosen from all of the blog hop comments, across all blogs, received by 11:59pm PST on Sunday, November 22nd. Check the Hero Arts blog for the announcement of the winner on Tuesday, November 24th.

That's it for me! I'm the last stop on the hop, but if you missed any of the other blogs, here is the full hop list!

SUPPLIES


Cardstock: Hero Arts Blush Mix cards, Papertrey Ink kraft, Bazzil black, Michaels white
Stamps: Hero Arts Color Layering Wreath and Build a Wreath by Lia
Ink: Hero Arts Black, Light to Red Royal ombre, Lime to Forever Green ombre, Versamark, Distress Ink
Other: Hero Arts white embossing powder, Martha Stewart glitter, black gem (Darice), ribbon (stash)

Tools: Cuttlebug, Hero Arts Color Layering Wreath Frame Cuts, Papertrey Ink woodgrain impressions plate, My Favorite Things brick cover plate

9.30.2013

As I procrastinate

...I have another old card post to share with you. I'm thinking this one is around...two(?) years old.

***********************
I don't know what it is with kraft, white, blue and red, but I love using them on cards (in a non-traditional way).


This Emma's Shoppe paper is so much fun - I added Glossy Accents to all the polka dots...I think I saw Kristina Werner doing it once with the Restoration line.


And those adorable Lawn Fawn chickies...


This is a bonus blog post - two cards in one!


Thanks for stopping in and God bless!


4.09.2013

Throwback Tuesday #4

Today's post is deuce! That is, two mini cards for one Throwback Tuesday post.

The deets: every Tuesday, I will post a card that has been sitting in the draft closet too long. At the end of each month, I will randomly select a winner from all the valid challenge entries!
The challenge: link up an old papercraft related blog post, card photo, or post one of your old drafts/pictures! An additional entry will be given to those who comment on the Throwback Tuesday posts for that month.
The prize: a big ol' box stuffed with scrapbooking goodies!
Sorry, but due to crazy shipping costs, this challenge is open to the US only!

And now for my old thoughts:

I love THIS set. Love. It.
The sweet mini images, the cute sentiment, the funky frame...pure sweetness.
So I made some mini cards - one cute, one funky.

Cutie.


 ...funky.


Some yummy embossed 'frosting'


The fix: honestly, since these are just wee little note cards, I don't think there is much I would do. I think they fulfill their simple purpose pretty well.

That's it for this Throwback Tuesday post! Thanks for stopping in and God bless!


**************************************
Card recipe 1
Cardstock: Unknown, Bazzil
Stamps: Papertrey Ink, MFS
Ink: Tim Holtz "Walnut Stain", "Shabby Shutters", and "Worn Lipstick", Tsueinko glue pad
Other: Martha Stewart clear embossing power

Tools: Cuttlebug, Nestabilities, heat embossing tool

Card recipe #2
Cardstock: Hero Arts, Bazzil
Patterned paper: October Afternoon "Fly a Kite"
Stamps: Papertrey Ink
Ink: Tim Holtz "Walnut Stain" and "Worn Lipstick"
Other: pearl (Recollection), string

12.30.2012

On the sixth day...

Using up some old kraft cardstock, some old-ish yummy October Afternoon paper, with some relatively new stamps and some brand new flower embellies.


If you'd like to win a large flat rate box stocked full of papercrafting goodies, you can participate in the my twelve days of Christmas challenge by checking out THIS post, or linking up your card on the sidebar!

Thanks for popping in today!

*********************************
Card recipe
Cardstock: Bazzil
Patterned paper: October Afternoon "Fly A Kite"
Stamp: Hero Arts "Just Saying Hi"
Ink: Staz-on
Flowers: Recollection (Michaels)
Pearls: Recollection (Michaels)

Tools: trimmer, adhesive, sewing machine, Cuttlebug, Nestabilities, scissors, MFS die, MS punch

9.02.2012

One week

...since I last blogged.
And what a week.
SO much stuff going on, it's ridonkulous! Good news is that today I get to be home for more than eight hours (which I usually spend sleeping) and I've got something to share.

Firstly, I want to thank you all for the sweet comments on my last post - you all make me blush with your kind, supportive words!

So here's my thank you. :)

I've never been so pleased with a one layer card I made (but then again, I think this is the first one ;))


Some additional coloring with colored pencils - I've seen lots of people with this stamp set doing this, so of course I had to try too. ;) Ooo, and there's also some subtle wet embossing going on as well...


I'm linking this up with Catered Crop - a new to me challenge blog. Just wanted to play along and give a shout out to their sponsor, Lilly Belle's. I've ordered twice from Laura, and she has been AWESOME. Got everything I wanted, at a reasonable shipping price, and with a coupon! Part I love most is that I was able to order everything from one place and only have to pay one (reasonable) shipping price!

Well, I'm off to spend my last few precious free hours with my family! Thanks for stopping in and God bless!

************************************
Cardstock: LSS
Stamps: PTI 'Rosie Posie' and MFT
Ink: Ranger, Versamark
Other: embossing powder (Martha Stewart), coloring pencils (Prismacolor)

Tools: trimmer, adhesive, scissors, heat gun

5.08.2012

Pink+kraft+blue=

...a satisfied me. :) Something about those colors just clicks with me - I always have so much fun making cards with that combo...I think something about them soothes and relaxes me.


Don't know if you can tell, but the 'of you' is embossed here - love Versamark!


Yummy flowers from Viola Mahr...


Found this button in my stash that matched the blue in the gingham perfectly. :)


For the Gingham Challenge at Moxie Fab World, CPS, Little Red Wagon (stitching), Little Darlings (flowers), RRR (feminine), 365 Cards (pink, pearl and paper), SSDS (ribbons and bows) and the ABC DT (graduation) challenges.
Thanks for your sweet comments on my last post - I appreciate them so much! :)
Have a blessed day!

**********************************
Card supplies
Cardstock: LSS
Patterned paper: October Afternoon "Fly A Kite"
Stamps: Hero Arts "Essential Messages" and "Everyday Sayings", MFT, Waltzingmouse Stamps "Very Vintage Labels 4"
Ink: Ranger 'Walnut Stain' and 'Worn Lipstick', Versamark, Martha Stewart
Other: ribbon and twine (Bearydo Shoppe), pearls (Zva Creative), button and doily (stash), flowers (Viola Mahr), embossing powder (Martha Stewart)

Tools: trimmer, adhesive, sewing machine, Cuttlebug, Spellbinders Labels 4 die, heat gun, Glossy Accents

2.02.2012

So grateful

...for all the good and trying things that have come my way lately. Good things being new crafty product, more time with friends and other assorted good news; the trying things mainly being lack of mojo and studying for CLEP tests (if the following statement makes any sense to you, you must be a psychologist/doctor/studier-of-the-nervous-system-person)

"The sympathetic nervous system's terminal buttons which synapse directly onto "target" organs, release noradrenaline, or norepinephrine, and are termed noradrenergic; in neuron-to-neuron communication, sympathetic neurons also use ACh."

Yeah, I was lost at noradrenaline too. ;)

But still, even though it's hard and frustrating, still grateful. The bitter helps me appreciate the sweet even more. :)
Anyhows, here's a card for this week CardPatterns sketch (haven't played in this challenge in forever!)...


Added glitter to the center of the flowers, decided it wasn't dimensional enough, added Glossy Accents, decided it wasn't glittery enough, added glitter, and then was semi-satisfied. Can't figure out what's not clicking with this card, but I'm too lazy to ponder it any longer lol.


Thanks so much for the sweet comments yesterday - took awhile, but I feel much better now. :)

Have a blessed day!

***************************************
Card recipe
Cardstock: LSS
Patterned paper: Crate Paper "Portrait"
Stapmps: PTI "Year of Flowers", MFS
Ink: Staz-on
Other: ribbon (stash), button (stash), glitter (Martha Stewart), Prismacolor watercolor pencils, hemp cord (Bearydo Shoppe)

Tools: trimmer, adhesive, scissors, Glossy Accents

11.18.2011

Be happy

...I know I am. :)

I used a LOT of old paper and scraps on this shabby card - OA, Girls Paperie, DCWV, Cosmo Cricket, and another company I'm not sure of. It was some double sided Christmas paper, with this beautiful kraft on one side.


Ahhhh, it feels so good to be posting these old photos. :)

Thanks so much for stopping in and have a blessed day!

******************************
Cardstock: LSS
Patterned paper: October Afternoon "Fly a Kite", The Girls Paperie, Cosmo Cricket "Honey Pie", DCWV
Stamp: MFS
Ink: Tea Dye
Pearls: Prima, Recollection

Tools: trimmer, adhesive, scissors, Cuttlebug, die

11.16.2011

For all that you do

...another oldy to share with you today!


Made this during a serious mojo rut (as I'm sure you can very well tell ;))
I faux stitched the card with a white pen, Kristina Werner style. Brace yourself people - I only discovered her blog around a year ago - I know, I know, you can pick your jaw off the floor now lol. ;)

Have a nice, warm (if you live in a cold area like us), blessed day! :)

ETA: Please give me your honest opinion on what you think of this new blog template - I have the original saved just in case y'all hate this one. ;)

*************************
Cardstock: LSS
Patterned paper: Crate "Restoration"
Stamp: MFS, Hero Arts 'Ledger'
Ink: Tim Holtz
Pearls: Kaisercraft
Flower: Recollection
Other: metal clip

Tools: trimmer, adhesive, scissors, MS punch, white pen

10.20.2011

A unusual color combo

This...
....is not my typical go-to color comb for cardmaking. I'm more of a 'pink and blue' gal myself, but somehow, I fond myself strangely attracted to this bold color scheme. I decided to give it a go, and here are the results...

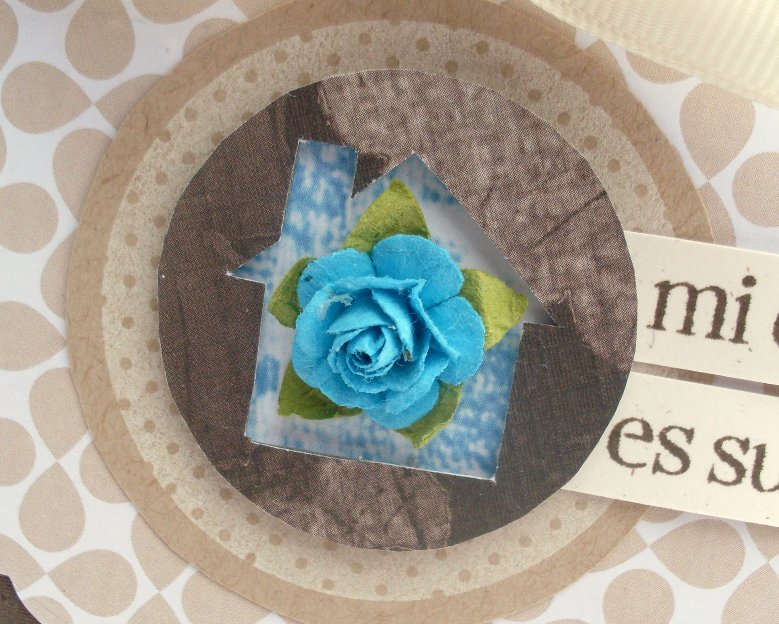
A chipboard house (inspired by the homey feel of the photo) covered with some yummy paper


 Next up, a card I thought would do well to thank the host/hostess if I were ever invited to such a party. ;)


I admit, the second of the two is my favorite - I love the blue here, and the subtle debossed dots...

Thanks for stopping in with me today!
Have a blessed one!

Blog: bearydocardsinc.blogspot.com
****************************
Brown Mod
Vintage Audrey 
Soul Field 
Cabochons
Icon Dots
Chip Arts Chipboard Shapes - Buttons and Buckles
Chip Arts Alphabet Stamps - Sparrow Numbers and Glyphs

11.14.2010

Noteworthy

Hi there!
Just quickly popping in to share this card - cutting close to the challenge deadline again! ;)

My sister found this Noteworthy paper pack at an old shop, and called me up to see if I would like it. 'Are you kidding?!' I had just discovered this line when it was discontinued, so it was very hard to find online (not to mention the few places that had it had ridiculous prices), so imagine how happy I was when she told me the paper pack was there, and for only three bucks!
I'm not much of a purple person, but this line is too sweet not to love! :) So I made a purple card, with lace, following Clare's challenge over at The Shabby Tea Room.


Instructions: Go shabby.

Don't you just love the pom pom trim? My super sweet friend Theresa sent me it, along with the pink lace and button shown, and lots of other goodies - thanks again, Theresa! :)

Thanks SO much for all the sweet comments - I really appreciate each and every single one! :)

PS - I asked awhile back if anyone had any suggestions for a light box, and unfortunately no one did, but you wanted to know if I found anything. Well, so far, not so good, but I am trying something else, but I haven't had the time to see how the photos turned out. Will let you know when I do! :)

***********************************
Card recipe
Cardstock: Bazzil
Patterned paper: Making Memories "Noteworthy"
Stamps: MFT
Ink: Martha Stewart, Tim Holtz Distress Ink
Gems: Prima
Other: ribbon (unknown), trim (unknown), thread

Tools: trimmer, adhesive, Cuttlebug, MFT die, sewing machine

10.02.2010

Beautiful day

Hello!

Happy World Cardmaking Day!!

Over at Simply Scrapping Crafts, we've got a fun little challenge going on, which you can find HERE. All you need to do is post one of your oldest cardmaking photos, and than post you latest card, with some optional fun questions to answer. There is a small mystery RAK up for grabs - check out the link for more details!

Thought I'd share the pic of one of my first cards - terrible, but funny. You can see the other one over at SSC....that is, if you really want to. ;)


I got some AWESOME lighting the day I took this photo, so I'm really pleased with how it turned out.
I felt like going a little retro with this card...the perfectionist in me is going crazy with how the paper isn't centered, and how the stamped frame isn't centered, but I'm just going to let go with this one...go a little wild. haha. ;)
Admittedly, I wasn't too wild about this paper pad at first, but it's grown on me, and now I love it (well...at least this particular pattern, anyways ;))


 Won the gorgeous stamps and die from 2S4Y - thanks SO much, girls! :)

Instructions: Cut patterned paper and adhere to pre-cut card base. Adhere strip of ribbon down patterned paper, roughing up the bottom end. Using die, cut out cream paper and stamp frame image and sentiment. Adhere to base, and top with roses.

I didn't have any other ribbon that matched the coral colored flowers in the paper except for this Dear Lizzy strip, and, since it looks kinda bunchy tied into a bow, I just used it straight - never done that before!

Thanks SO much for stopping in, and here's to another year of cardmaking goodness! ;)

*****************************
Card recipe
Cardstock: Hero Arts
Patterned paper: Sassafras "Indie Girl"
Stamps: MFS
Ink: Staz-on
Ribbon: Dear Lizzy, Websters Pages
Roses: Remembrance (Michaels)

Tools: trimmer, adhesive, MFS die, Cuttlebug, scissors