Showing posts with label Altenew. Show all posts

9.20.2017

Toile de Jouy

I'm over on the CardMaker blog today with a Toile de Jouy inspired card! Don't know what that means? Head on over to the blog to find out!


Thanks for stopping in today and God bless!

11.15.2016

Quasi-One Layer Wonder // Altenew

I'm over on the MarkerPOP blog today, showing a (sorta) one layer card, using a layering stamp set...


Head on over to the blog for more details!

7.19.2016

Diagonal Ombre // Altenew

Hello! Just popping in to let you know I have a new post up over on the MarkerPOP blog, explaining this little number...


Pop on over to the blog for details!

7.12.2016

Peachy Congrats // Altenew

Hello! I'm over on the MarkerPOP blog today, sharing a lovely peachy card...


This card was a snap to make - I love how these Altenew stamps look fabulous no matter what you do, and how easy they layer, making any card look instantaneously elegant.

Pop on over to the blog for more details!

5.26.2016

Coloring Kraft and Vellum // Altenew

Today I have a set of cards and a video that I made quickly the night before I left for my vacation.


Here's a video on how I made the pair...


If you are having problems viewing this video, please try watching it HERE on YouTube.
I had so much fun finally playing with Altenew's Botanical Garden stamp set! Such a gorgeous set, that I had to play coloring them on kraft and vellum.


For the cards, I embossed the flowers using some pretty copper embossing powder on kraft. I then colored them in with some Zig Clean Color Real Brush pens (I know, it's a mouthful!) - very simply coloring, but these pens work like butter.


I then did the same for the vellum flowers, and cut them out. I hand cut them out, but apparently there are coordinating dies - on my wish list now! ;)


Same card, different orientation! For the sentiment, I wanted the sentiment to be glossy, but I wanted the navy color, so I inked up the sentiment with Versamark first, then with navy ink from Studio Calico. With the stickiness, I was able to emboss the sentiment with clear powder to get that glossy, yet colored, look.


I was inspired by the current Altenew From Places Abroad challenge...


Thanks so much for stopping in and God bless!

SUPPLIES


Cardstock: white (Michaels), kraft (Papertrey Ink), vellum (Joann Fabrics)
Stamps: Altenew Botanical Gardens and Label Love
Ink: Versamark, Zig Clean Color Real Brush Pens Blue, Deep Blue, Green and Deep Green, Sakura White Opaque Glaze Pens, Studio Calico navy
Other: Hero Arts Copper and Clear Embossing Powder

Tools: Hero Arts embossing gun

5.09.2016

Elegant Painted Flowers // Altenew

This card is a just for fun card - I made this a couple months ago, but am just finally getting around to sharing it. I should be studying for accounting...but...I'm not. ;)


Let's be real - this Painted Flowers stamp set by Altenew is one of the best stamp sets ever. Definitely in my top ten. What about you?

Thank so much for stopping in today!

SUPPLIES

Cardstock: Michaels
Stamps: Altenew Painted Flowers, Hero Arts Cheers Messages by Lia
Ink: Distress Inks, Studio Calico Color Theory, Versamark
Other: Martha Stewart embossing powder, pearls (stash)

Tools: heat gun

2.15.2016

Watercolored Vellum Wreath + VIDEO + GIVEAWAY // Altenew

Hey all! Today I have another card using vellum (I can't seem to stop!) and a video! To see my Hero Arts post, go HERE.

I knew as soon as I laid eyes on the Doodle Blooms stamp set that I had to make a wreath with those delicate leaf images! And of course, I had to gold emboss them, and do it on vellum - one thing led to another, and this card was "born" and filmed in the space of about thirty minutes! Unfortunately, it took me a lot longer to narrate it, since my one year old niece and three year old nephew are visiting, so the house is hardly quiet. ;)


The how-to video...

If you are having problems viewing this video, please try watching it HERE on YouTube.

Gah! I really need to cut back on the vellum! But seriously, how pretty are these images embossed, colored and die cut? Because seriously, if you're considering this stamp set (which you definitely should be), the dies are pretty much a must. It makes creating light, fluffy cards so much easier and so much more fun.


I stamped the background with the leaf images, and embossed a sentiment from Beautiful Day to complete the card.


Thanks to Nicole and Altenew for this opportunity - I had so much fun! Though I was a teeny bit nervous creating a video for something other than my own entertainment (as I always am ;)).


For all the details on this fun video challenge, and a chance to be the next guest designer for the Altenew video challenges, go HERE.

Because I love this company and their stamps so much, and to thank you for stopping in, I'm giving away a $30 gift card to Altenew. You have three ways of entering, for a total of three entries:
Just leave a comment on this blog post, the YouTube video, and THIS Instagram post.

This giveaway ends 2/28.

Thanks so much for stopping in and God bless!

SUPPLIES


Cardstock: Canson Bristol
Stamps: Altenew Beautiful Day and Doodle Blooms
Ink: Tim Holtz, Versamark
Other: embossing powder (Hampton Arts - gold, Hero Arts - gold)

Tools: paint brush, water, Cuttlebug, Altenew Doodle Blooms dies, heat gun

1.01.2016

Watercolor Vellum // Altenew

Happy new year!! 
This post was meant to be my last post of 2015, but between enjoying my time with my siblings, and the terrible lighting, I've just gotten the chance to take pictures and narrate the video. 
These cards are for the Altenew video challenge #3 - I always have so much fun with these video challenges!


I apologize, the pictures are sooooo off, but I had to take them indoors because the weather has just been crummy whenever I had time to shoot.


Finally got a chance to use this Beautiful Day stamp set from Altenew! Red isn't usually my go-to color of choice when I make cards, but I thought it looked so beautiful paired with the white embossing and kraft.
I colored my flowers in using Festive Berries Distress Ink and water - yep, water! You can watercolor vellum! It's super fun, and holds up relatively well! The vellum I used here was from a large, cheapy pack I got from Joann Fabric's, and even though I added more water than I should've, it still held up relatively well.


Since the vellum was covering the entire panel, I made room for a little border on the top and bottom of the embossed panel, so that I could fold it over and adhere the vellum down behind the front of the card, like so...


For more tips on watercoloring with vellum, check my video below;


Thanks so much for stopping in and I hope your new year is off to a great start!

SUPPLIES


Cardstock: Canson, Bazzill, Papertrey Ink
Stamps: Altenew Beautiful Day
Ink: Versamark, Tim Holtz (red), Hero Arts (white)
Other: embossing powder (Hero Arts)

Tools: heat gun, paintbrush, water, Cuttlebug, My Favorite Things Stitched Rectangles die

11.04.2015

Masked Halo + VIDEO // Altenew

...no, Masked Halo is not the name of some new superhero (at least, not that I know of...), but rather the technique I used for today's cards and video.
The video is me playing along with Altenew's second video challenge.


I used Altenew's Painted Flowers for both cards - goodness, if you could wear down stamp sets to nubs like erasers, I would totally have worn this set down by now.


A sentiment banner from Vintage Roses tops off the card.


Here's the video, starring Masked Halo! hahahaha


Just a quick note of apology for my lack of responding to e-mails, comments, posts, etc - it seems my professors want to make up for fall break, and so I've gotten a load of school work dumped on me this week. Hopefully I can clamber out of it soon...

Thanks for stopping in and God bless!

SUPPLIES


Cardstock: from local craft store, Bazzill (for black)
Stamps: Altenew Painted Flowers and Vintage Roses
Ink: Studio Calico, Tim Holtz, Hero Arts, Versamark
Other: gems (Darice), embossing powder (Hero Arts)

Tools: Cuttlebug, circle die, heat gun, water, paintbrush

8.22.2015

Die Within a Die // Altenew

Hello there, today I'm popping in with a card for the August Altenew challenge, Simon Says Stamp Monday Citrus challenge, and a little way to stretch your dies (I think that phrase is funny, since dies are metal and very...unstretchy)

I was mainly inspired by the dark woodgrain wall and the pops of yellow from the inspiration photo, and yes, you guessed it, I used Vintage Roses.
That set is definitely high in my ranks of the Stamp Greats.


Stamping the flowers was funny and easy, as was arranging them (read: I just piled them all together and stuck leaves in randomly). I knew I wanted to use this patterned paper from a Maggie Holmes paper pad, but I didn't know how I was gonna frame the flowers, as I didn't want to take away from the bold brown.
I eventually decided on pulling out an oldie but a goodie die set, Nestabilities Labels 4, and so that I only got a small pop of white, I die cut a window, using the two largest frames.
This technique isn't limited to die sets or dies of the same shape - you could even cut a circle, and then a heart or flower inside it!


I heat embossed the sentiment inside my frame, topped the roses off, and I was done! I will add a bit of forewarning on the sentiment though - I used the EK Success powder tool to make sure the embossing powder would only stick where I stamped the sentiment. It filled its duty admirably, but it left some traces of its own powder behind. I've found this is the case with other dark papers - the powder tool won't completely brush off and will leave some light residue.
So I would say to use the tool very lightly on dark cardstock, or go with some good old fashioned cornstarch, which works the same way.

Thanks for stopping in and God bless!

SUPPLIES

Cardstock: Michaels, Papertrey Ink
Stamps: Altenew "Vintage Roses"
Ink: Tim Holtz, Studio Calico
Patterned paper: Crate Paper - Maggie Holmes "Open Book"
Other: pearls (Darice), embossing powder (Hero Arts)

Tools: heat gun, Nestabilities Labels 4 dies, Cuttlebug

7.12.2015

Framed Sentiment + VIDEO // Altenew

Hiya peeps! I hope you're having a nice Sunday so far - I'm just coming off an unplanned but totally wonderful two hour nap.

image source

I'm a big believer in naps, just like Winnie Pooh.

Anyways, I'm popping in real quick with a card for the Altenew Video Challenge, and yet another card for Virginia's View 100% Stamping challenge.


This was a surprisingly quick and easy card to make/film. Generally, I sorta have my cards planned out before I turn on the camera, but with this one, I just ran with it.
I knew I couldn't go wrong using Painted Flowers, so I started by using them to create a frame of sorts around a stamped sentiment from Vintage Roses (also another stamp set you can't really go wrong with) that I used as a guideline.


Once all the flowers were stamped, I cut out the original stamped sentiment, and adhered it to a navy cardstock panel that had the sentiment heat embossed in white.
I topped everything off with some pearls and some ribbon (sidenote: it has been forEVER since I've used ribbon!!)

So, if you want to actually hear me say all that, enjoy the video below. ;)


Thanks so much for stopping in and God bless!

***********************************************
Cardstock: Bazzill, Michaels
Stamps: Altenew "Painted Flowers" and "Vintage Roses"
Ink: Studio Calico, Versamark
Other: pearls, ribbon, embossing powder

Tools: heat gun

6.13.2015

Watercolored Roses // Altenew

Popping in with a simple card for Simon Says Stamp Wednesday challenge (friends), Simon Says Stamp Monday challenge (plants) and Altenew's From Places Abroad: Tunisia challenge. As with last month's challenge, I was mostly driven by the striking colors - navy, teal, and orange/gold.


I was really just playing around on this card. For the flowers, I sometimes lightly misted them with water before stamping, and sometimes I stamped them directly and went back in with water and a paintbrush to soften things.
I don't know about you, but I am a huge fan of the watercolor trend - messiness is not only encouraged, but required! ;)

Oh, and isn't that sentiment so fun? I know many friends who this would be perfect to send to.

Thanks so much for stopping in and have a blessed weekend!

*************************************


Cardstock: Canson
Sentiment stamp: Papertrey Ink
Colored inks: Studio Calico

4.13.2015

Layering layered images // Altenew

Hot dawg.
This card was a frustrating one to make and photograph.
Ah well, I've put my behind in the past.

Er, I've put my past behind me. ;)


I played along with the Altenew From Places Abroad challenge photo as inspiration, so I started out by stamping a TON of Vintage Roses flowers in reds and blues. Then I cut out the flowers (which was a nice, mindless thing to do - and I do love being mindless) and started arranging them. Which is where all the trouble started.


I had the darndest time trying to make the colors work without being overwhelming, and then layering them all together. I ended up ditching the reds because they looked a little too dramatic with the blue, which made layering the flowers a lot easier but still a bit of a challenge.


I finally managed to get everything to work semi-cohesively, after a few nights struggle with the problem. I thought it'd be fun to show you a bit of the "evolution" of the card. ;)


Of course, there is still the problem of the gold embossing not matching the gold glitter leaves, but at this point, I am just happy to call it a day. Or a card. Whatever.

Thanks so much for stopping in and God bless!

***********************************


Supplies not shown:
Paper: vellum (Darice), cardstock (Canson)
Ink: Studio Calico Color Theory
Die: Papertrey Ink "Life is Sweet" die and woodgrain impression plate

2.27.2015

Altenew // Vintage Roses

Playing along with Altenew's February challenge, using this beautiful inspiration piece...


...and also for Simon Says Stamp Wednesday Anything Goes challenge,
There is so much pretty in this picture that I had a hard time choosing which elements to focus on. In the end, I decided to mimic the embossing, jewelry, gold and pink, and then those little pops of blue.


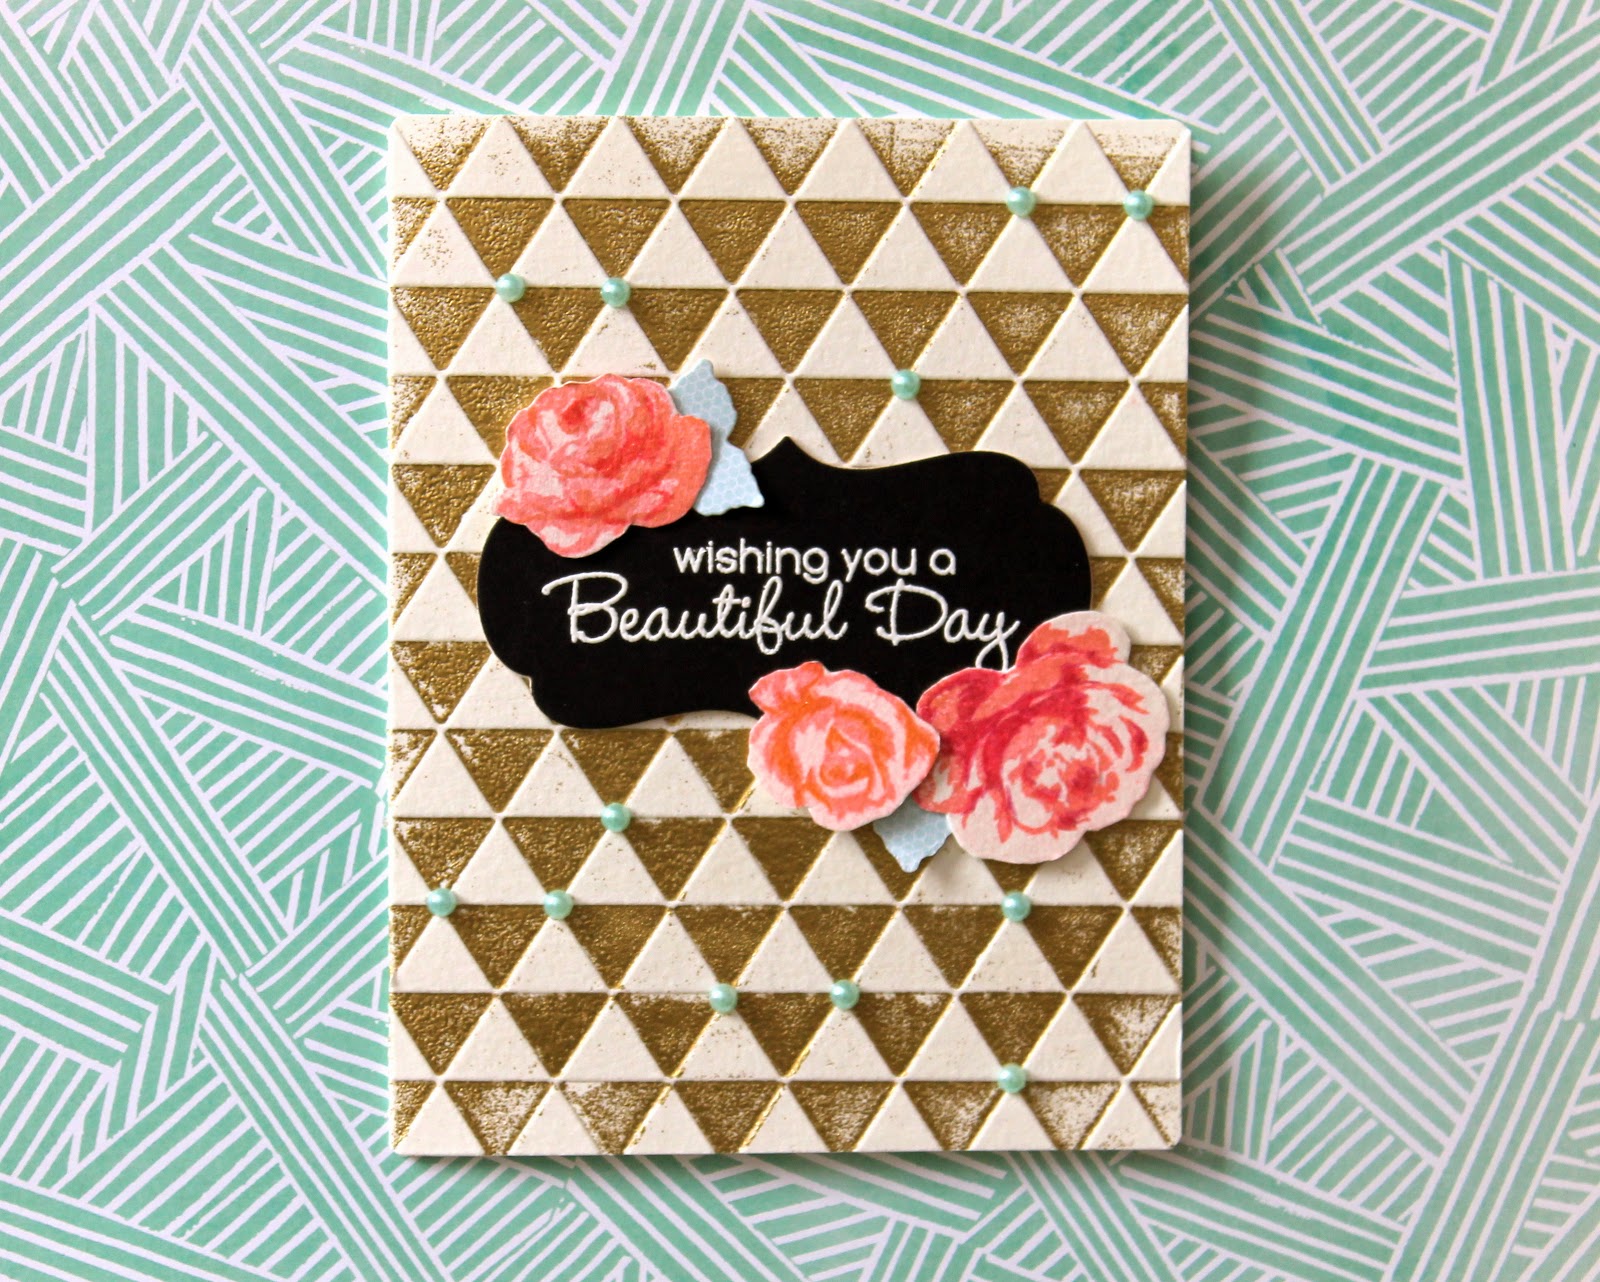
For the base, I took my Love Triangle embossing folder, then lightly wiped my Versamark ink pad over the raised part. I wasn't particularly concerned with getting perfect coverage, and once I embossed the front of the card base, I covered it with gold embossing powder. I had to brush off a decent amount of powder that was clinging to the wrong triangles, but it wasn't too labor intensive.
I topped off the card base with a die cut and embossed sentiment, then some roses from Altenews gorgeous Vintage Roses set - love love love this set! Again, I wasn't concerned with stamping the roses perfectly or using all coordinating inks - you should know that when I say "I wasn't concerned with", it's basically my code phrase for "I was too lazy/impatient". ;) Anyways, I trimmed the flowers, adhered them to the base with some scrap die cut leaves, and, to mimic the jewelry in the photo and to bring out the blue, I topped off the base with some blue pearls.

Thanks so much for stopping in and God bless!

*********************************
Cardstock: Canson, Bazzill
Stamps: Altenew "Vintage Roses", MFT "Framed Greetings"
Ink: Versamark, Studio Calico, Tim Holtz
Other: pearls and embossing powder (Darice)

Tools: Cuttlebug, Cuttlebug Love Triangles embossing folder, MFT Framed Greetings die, PTI Life is Sweet die, heat gun

6.12.2014

Back home

...from a short but fun trip to Nashville with some friends, to visit the Nashville Dominicans. :)

I'm really excited about the two cards I'm sharing today, and I was planning on going on and on about the amazing stamp set I used to make them, but honestly, I'm still kinda loopy from twelve hours of driving, so I may have to save it for another day.

These two cards are for the Simon Says Stamp Stencil challenge, the Word Art Wednesday Anything Goes, Paper Crafting Magic Stencil, NBUS Anything Goes, and the Fusion Card challenge.


The set I wanted to gush about is the Altenew Painted Flowers (which appears to be sold out on their website again - good for them!) 
This set is pretty much one of my stampy dreams. 
YUMYUMYUM.

I had a really hard time putting it down, so basically I made four variations of the above card in two days, and here is just one of those variations. 


For both cards, I masked off the sentiments (using them as a my stencils) using die cut washi tape, but for this second card, I also impressed the dies into the cardstock, in hopes that the ink wouldn't bleed so much when I stamped over the mask. I don't think it helped much, but I think it added just a teensy bit of legibility, which is the only straw I have with these cards.

Of course, I couldn't have made either card without the Mama Elephant Inline Letters dies or the Paper Smooches Quote Tag dies, both of which are pretty much my die-cutty dreams.

Mmmm, dreams...dreams sound good.

Thanks for stopping and God bless!


******************************
Cardstock: Canson, Core-dinations
Stamps: Altenew "Painted Flowers"
Ink: Distress Ink, Hero Arts, Papertrey Ink
Other: washi tape

Tools: Cuttlebug, Mama Elephant Inline Letters dies, Paper Smooches Quote Tag dies