Showing posts with label Bazzill. Show all posts

4.25.2016

Retro Happy Birthday // Papertrey Ink

It's been awhile since I've had a free moment to play along in a contest or blog hop, so I'm so happy to share this card I made for this month's Papertrey Ink blog hop.


I've wanted to play with the Retro Style stamps for awhile now, so I finally caved a couple months ago and bought them. I have to admit, they're a little overwhelming at first because there's so many layers to the stamp set and SO many different ways to make a card with them, but they're gonna come in handy making masculine cards.


I have to say, the arrow and the sentiment are my favorite parts of this card. I really like the look of detailed sentiments like this, die cut and popped up on foam. The little gems I found on eBay, when I was looking for a cheap clear droplet substitute (I ended up caving on the droplets too, and buying them later haha)

Here's the inspiration photo for the April Papertrey Ink blog hop - I was a little worried at first, as I've never really used this color scheme before, but the challenge proved to be very fun!


Thanks so much for stopping in and God bless!

SUPPLIES


Cardstock: Canson, stash
Patterned paper: Crate Paper Bloom, Bazzill Wayfarer
Stamps: Papertrey Ink Retro Style Birthday Sentiments
Ink: Versamark, Tim Holtz
Other: gems (eBay)

Tools: Cuttlebug, Papertrey Ink Retro Style dies, Mama Elephant star dies, circle dies

4.21.2015

Quilling // Lawn Fawn

I decided the blog was getting overwhelmed with girly cards again, so here's a masculine/gender neutral card to spice things up a bit.

This card was published in one of the last issues of Paper Crafts & Scrapbooking...*sigh* I miss that magazine.


No joke, I pulled this quilled frog from my scraps basket, and I made it at least, oh, six years ago! I had a little thing for quilling for a while when someone gifted me a Klutz quilling how-to book, but I eventually found it too time intensive for my style of cardmaking.
I can spend hours playing around with the arrangement of items on my cards, but I don't care to spend too much time on individual items, thus I don't involve myself with Copics or fancy coloring shtuff.


Quilling this frog was pretty simple though. I don't know all the technical terms, but the frog's head is just a tight circle, and the other pieces of his body are loose circles pinched in simple, various ways. Add a little smile with a marker, then attach some googley eyes, and there's you have your frog!

Thanks for stopping in and God bless!

*****************************************


Supplies not shown
Quilling tools/design/paper: Klutz
Other: googley eyes (stash), vellum (Joann Fabrics)

3.18.2015

Hero Arts // Butterfly Framelits

Ah, now that I've posted a manly card, I can turn back to my natural inclinations...


Dang, this card was hard to photograph.
I used my Tim Holzt Distress Ink markers to selectively color the stamp. The image was etched in rubber, which works well with the markers. Clear stamps? Not so much.

But now let me pose you a question;
Let's be real here, peeps - do you like it when I link products, using something like Inlinkz? Or is it a feature that just takes up space?
PLEASE TELL ME.

Okay, that's it for today - thanks for stopping in and God bless!
Also, seriously, please tell me if you prefer linked up products. ;)

************************************************
Cardstock: Canson, Bazzill
Patterned paper: Dear Lizzy
Stamps: Hero Arts "Butterfly #3"
Ink: Versamark, Tim Holtz, Versamagic
Other: gems (Darice)

Tools: Cuttlebug, Hero Arts Framelits die, heat gun

2.27.2015

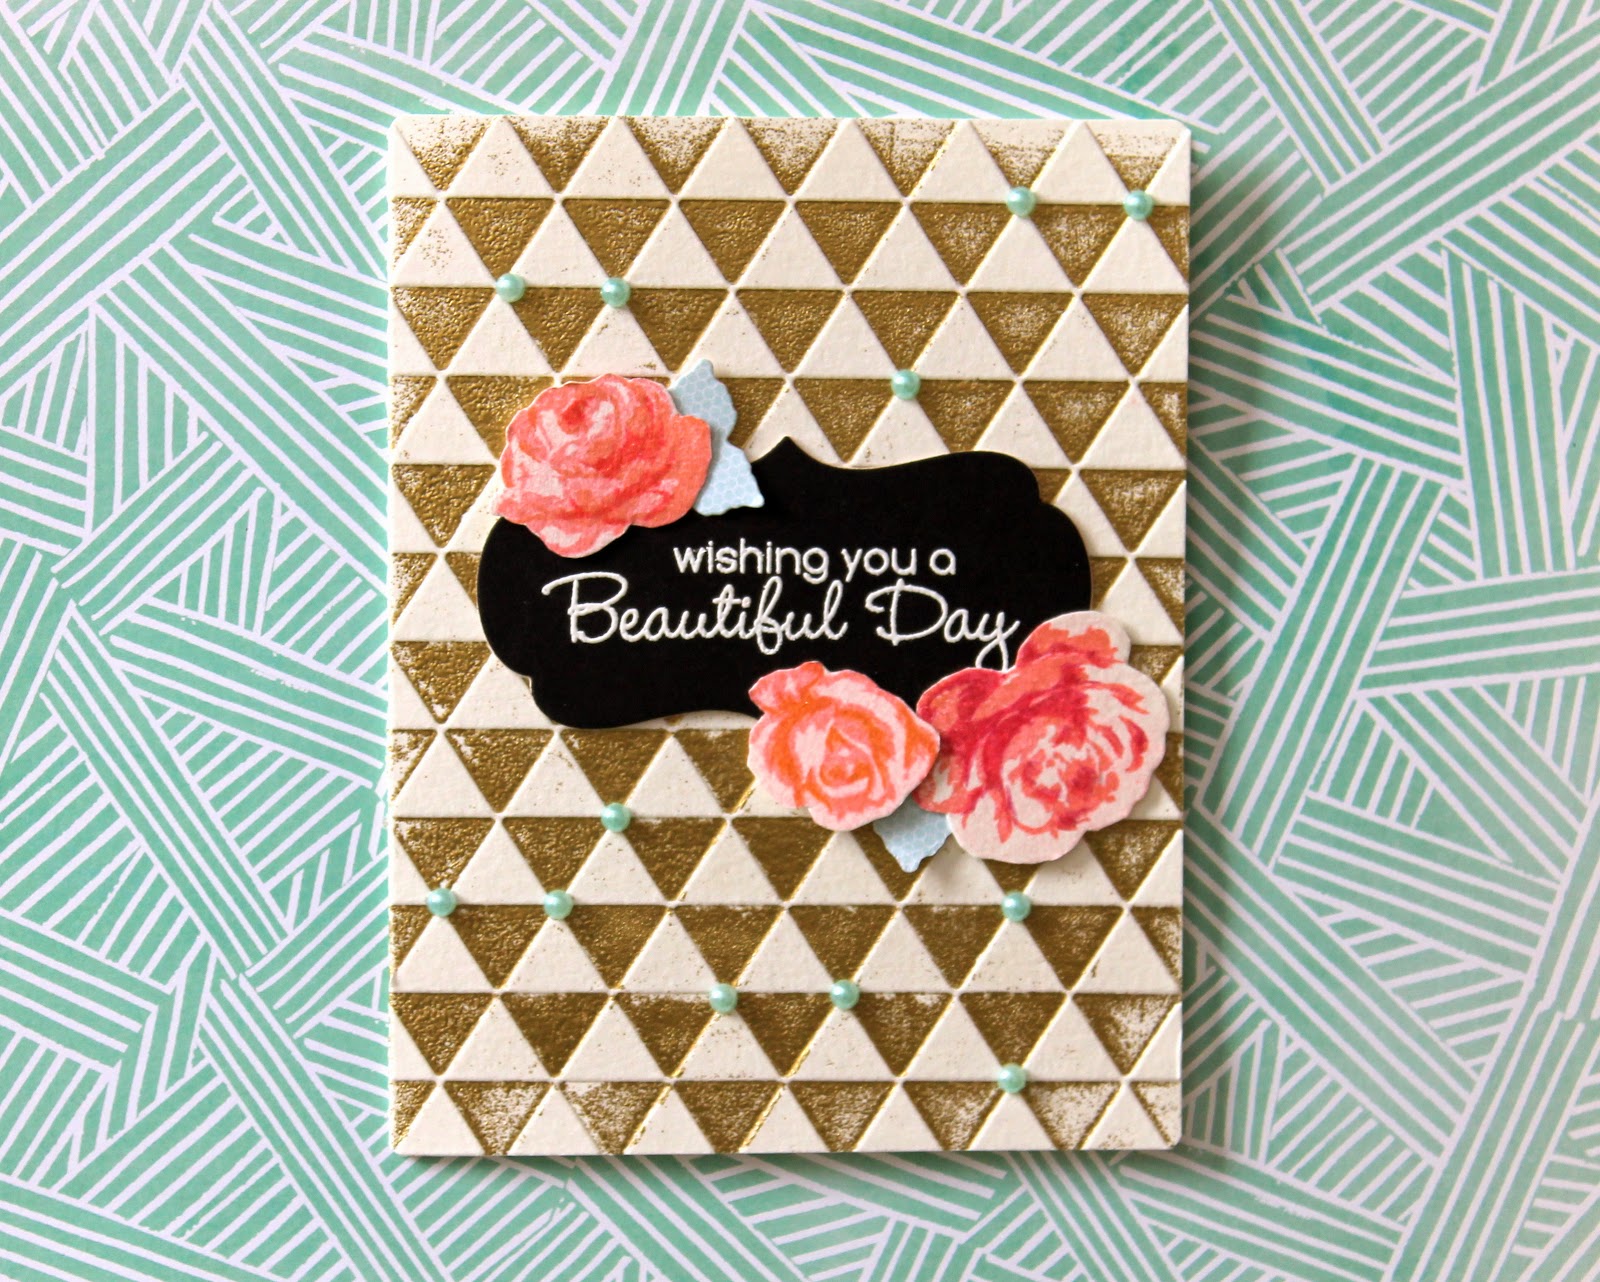
Altenew // Vintage Roses

Playing along with Altenew's February challenge, using this beautiful inspiration piece...


...and also for Simon Says Stamp Wednesday Anything Goes challenge,
There is so much pretty in this picture that I had a hard time choosing which elements to focus on. In the end, I decided to mimic the embossing, jewelry, gold and pink, and then those little pops of blue.


For the base, I took my Love Triangle embossing folder, then lightly wiped my Versamark ink pad over the raised part. I wasn't particularly concerned with getting perfect coverage, and once I embossed the front of the card base, I covered it with gold embossing powder. I had to brush off a decent amount of powder that was clinging to the wrong triangles, but it wasn't too labor intensive.
I topped off the card base with a die cut and embossed sentiment, then some roses from Altenews gorgeous Vintage Roses set - love love love this set! Again, I wasn't concerned with stamping the roses perfectly or using all coordinating inks - you should know that when I say "I wasn't concerned with", it's basically my code phrase for "I was too lazy/impatient". ;) Anyways, I trimmed the flowers, adhered them to the base with some scrap die cut leaves, and, to mimic the jewelry in the photo and to bring out the blue, I topped off the base with some blue pearls.

Thanks so much for stopping in and God bless!

*********************************
Cardstock: Canson, Bazzill
Stamps: Altenew "Vintage Roses", MFT "Framed Greetings"
Ink: Versamark, Studio Calico, Tim Holtz
Other: pearls and embossing powder (Darice)

Tools: Cuttlebug, Cuttlebug Love Triangles embossing folder, MFT Framed Greetings die, PTI Life is Sweet die, heat gun

2.25.2015

Papertrey Ink February Blog Hop Challenge

I was totally inspired by THIS pin. I was too lazy to get fancy with masking the stamped City Scene buildings, so I just freehanded it, using a bunch of random stamp pad for the colors.


You can't tell, but the "limit" has some Wink of Stella just because I wanted to put SOMETHING sparkly on there. ;)

Thanks so much for stopping in and enjoy the rest of the hop!

***************************************
Cardstock: Canson, Bazzill
Stamps: Papertrey Ink "City Scene" and "City Scene Sentiments"
Ink: Studio Calico, Hero Arts, Tim Holtz
Other: Wink of Stella

Tools: paintbrush, water

2.23.2015

Lawn Fawn // Hello Baby

Another scrappy card! I tell ya, I'm on a roll! Today's card uses some leftover die cut flowers from THIS card.

I'm playing along in the Simon Says Stamp and Lawn Fawn Flickr Co-challenge that my sweet friend Barb is co-administrating. Just use some kraft paper/ink and Lawn Fawn and/or Simon Says Stamp product!

I used the Lawn Fawn Hello Baby (the images are SO cute!) and Simon Says Stamp Inside and Out Sayings (one of my favorite sentiment stamps sets) sets for my card, as well as the SSS Mini Hearts die...


Momma bunny accidentally got some blush on her nose, so pay no heed to that. ;)

Thanks so much for stopping in today and God bless!

****************************************
Cardstock: Canson, Bazzill
Patterned paper: DCWV, Crate Paper (both retired collections)
Stamps: Lawn Fawn "Hello Baby", Simon Says Stamp "Inside and Out Sayings", WPlus9 "Fresh Cut Florals"
Ink: Versamagic, Stazon, Tim Holtz

Tools: Cuttlebug, circle die, WPlus9 Fresh Cut Florals die, Lawn Fawn Hello Baby dies, Simon Says Stamp Mini Hearts die

1.01.2015

Smile

...it's 2015! I typically do a post with my favorite cards from the past year, but if I get caught up in the time-consuming task of being a bum this Christmas break, don't be surprised. ;)


I wanted to test out the Hero Arts SMILE background stamp, but I used an old Staz-on ink pad, getting a rather uneven impression. I decided to roll with it, and go watercolor, because we all know it's quite fashionable to be messy, if you do it in watercolor. ;)


Just because I like to keep adding tiny, minuscule little details to my cards until my brain hurts - little bits of Stickles on the stamped hearts.

Finished off with some vellum, die cut hearts, and a rather obvious sentiment. ;)

Hope you have a happy new year, for the WHOLE year!

*************************************
Cardstock: Canson, Bazzill
Stamps: Hero Arts
Ink: Versamark, Stazon
Other: embossing powder, vellum, stickles

Tools: Cuttlebug, heat gun, My Favorite Things dies, Papertrey Ink die, Simon Says Stamp die

11.16.2014

I miss

...a lot of things, but most especially, my family's faces! Only 25 more days!


So, in case you can't tell because of my poor design skills, that little guy with ribbon coming out of the bottom and top of his face is a watch.
Yep.

Man, it looked so much better in my head.
Ah well.

********************************
Cardstock: Canson
Patterned paper: Bazzill Basics
Stamps: Paper Smooches
Ink: Stazon, Memento
Other: gems, ribbon (Papertrey Ink)

9.08.2014

Pinkfresh Studio & Pretty Little Studio Blog Hop


Pinkfresh Studio is so excited to join with Pretty Little Studio today to inspire you with some cute creations. Pretty Little studio is known for their vintage inspired products which are so fun and colorful. And mixing them up with unique and colorful Pinkfresh Studio embellishments definitely has created awesome projects. We have a list of designers from both companies here who are so thrilled to share their projects with you. Make sure to visit each blog and comment on each blog to enter a giveaway including Pinkfresh Studio blog. One winner will be chosen for each day and winners will receive 30.00 worth of stuff from Pinkfresh Studio and 30.00 GC from Pretty Little Studio. This is going to be two days of blog hoping fun. Winners will be announced on 9/15. Good luck!

Welcome to day one of the blog hop! 
Pretty Little Studio has the CUTEST die cuts, papers and embellishments, and I had so much fun playing with them! I particularly liked their die cuts, and I just love ALL of their gold sticker products.
So I combined my two favorites, Aster Gold Ribbons and Poppy #2, along with some patterned paper on my card, and then a Pinkfresh Studio stamped sentiment to tie everything together! 


For my second card, I decided to go the opposite route and focus on the stamping, topping off the subtle background created with the Think Less Live More stamp set with the adorable Frisbee.


Isn't he just adorable?

Only a few more stops to finish up today's hop! Thanks SO much for joining me!!

  Clare Prezzia <<<<<  you are here!


*****************************
Card #1
Cardstock: Bazzill
Stamps: Pinkfresh Studio Limited Edition Kit stamp
Ink: Stazon
Paper, die cut and sticker: Pretty Little Studio "Marigold"
Other: gems (Michaels)

Card #2
Cardstock: Bazzill
Stamps: Pinkfresh Studio "Hello" and "Think Less Live More"
Ink: Studio Calico, Versafine
Die cut: Pretty Little Studio "Marigold"
Other: gem (Michaels)

9.07.2014

You party animal

...I just love THIS sentiment from Avery Elle, and thought it went perfectly with the fox on my card today.

I made this card right before I left for Austria, so this is for the Foxy Foxes Challenge in the Moxie Fab World. Honestly, I'm a little sad that not many people play along with the Moxie Fab challenges any more, especially because most of them are so fun!


For little Mr. Foxy, I embossed his face with clear embossing powder, then I brushed the cardstock with cornstarch right before my next layer of embossing. This helps the embossing powder stick only to the places I put sticky ink.
Then I took my Versamark pen and "colored" in the face, then embossed it in white. Another thin layer of cornstarch (just to make sure the embossing powder didn't stray) and then the last embossing, with orange. The cornstarch brushes off without leaving much, if any, residue, and is very helpful, if you don't have an anti-static embossing brush. 
The embossing powders I used were pretty cheap, which is probably why the fox's face is a little blotchy.
I topped off Mr. Foxy with a fun wreath stamp I was dying to use, a gem, and then adhered it to the card base, with the sentiment already heat embossed. 

Thanks so much for stopping in today and God bless! 

**********************************
Cardstock: Canson
Stamps: Hero Arts "Fox" and "Sundrifter: Love This", Avery Elle "
Ink: Versamark
Other: embossing powder (Hampton Arts), gems (Michaels)

Tools: heat gun, Nestabilities Circles die, Cuttlebug

6.04.2014

What to do

...I've been getting a lot of things done this week, now that I'm finished with summer classes, but I've gotten to the point where I only have a few things left to do, and those are the things that I'm really dreading.

So, in an effort to make myself feel productive (without actually getting anything done), I'm writing this up and sharing a cute little card for this weeks Lawnscaping challenge...


...using some heat embossing.


I used the new, super cute Chit Chat stamps and dies, along with the Gnome Sweet Gnome stamps and dies. I'm not gonna lie, I'm a little bit obsessed with coordinating stamps and dies, plus, the Chit Chat bubble dies are definitely dies that could be used by themselves (oh, and this is definitely not me trying to justify my recent, rather large stamp/die purchase...;))


I thought it was fun how the button I used above the gnome happened to have the name "Ralph" on it. ;)

Anyways, thanks so much for stopping in, and I hope you have a more productive day than mine is turning out to be thus far! ;)

***************************
Cardstock: Canson, Bazzill
Stamps: Lawn Fawn "Chit Chat" and "Gnome Sweet Gnome"
Ink: Versamark, Distress Inks, Stazon
Patterned paper: Dear Lizzy "Lucky Charm"
Other: buttom, string, vellum, embossing powder

Tools: heat gun, Cuttlebug, My Favorite Things Framed Greetings die, Lawn Fawn Chit Chat and Gnome Sweet Gnome dies