9.28.2015

Simple Patterned Paper Layering // Hero Arts

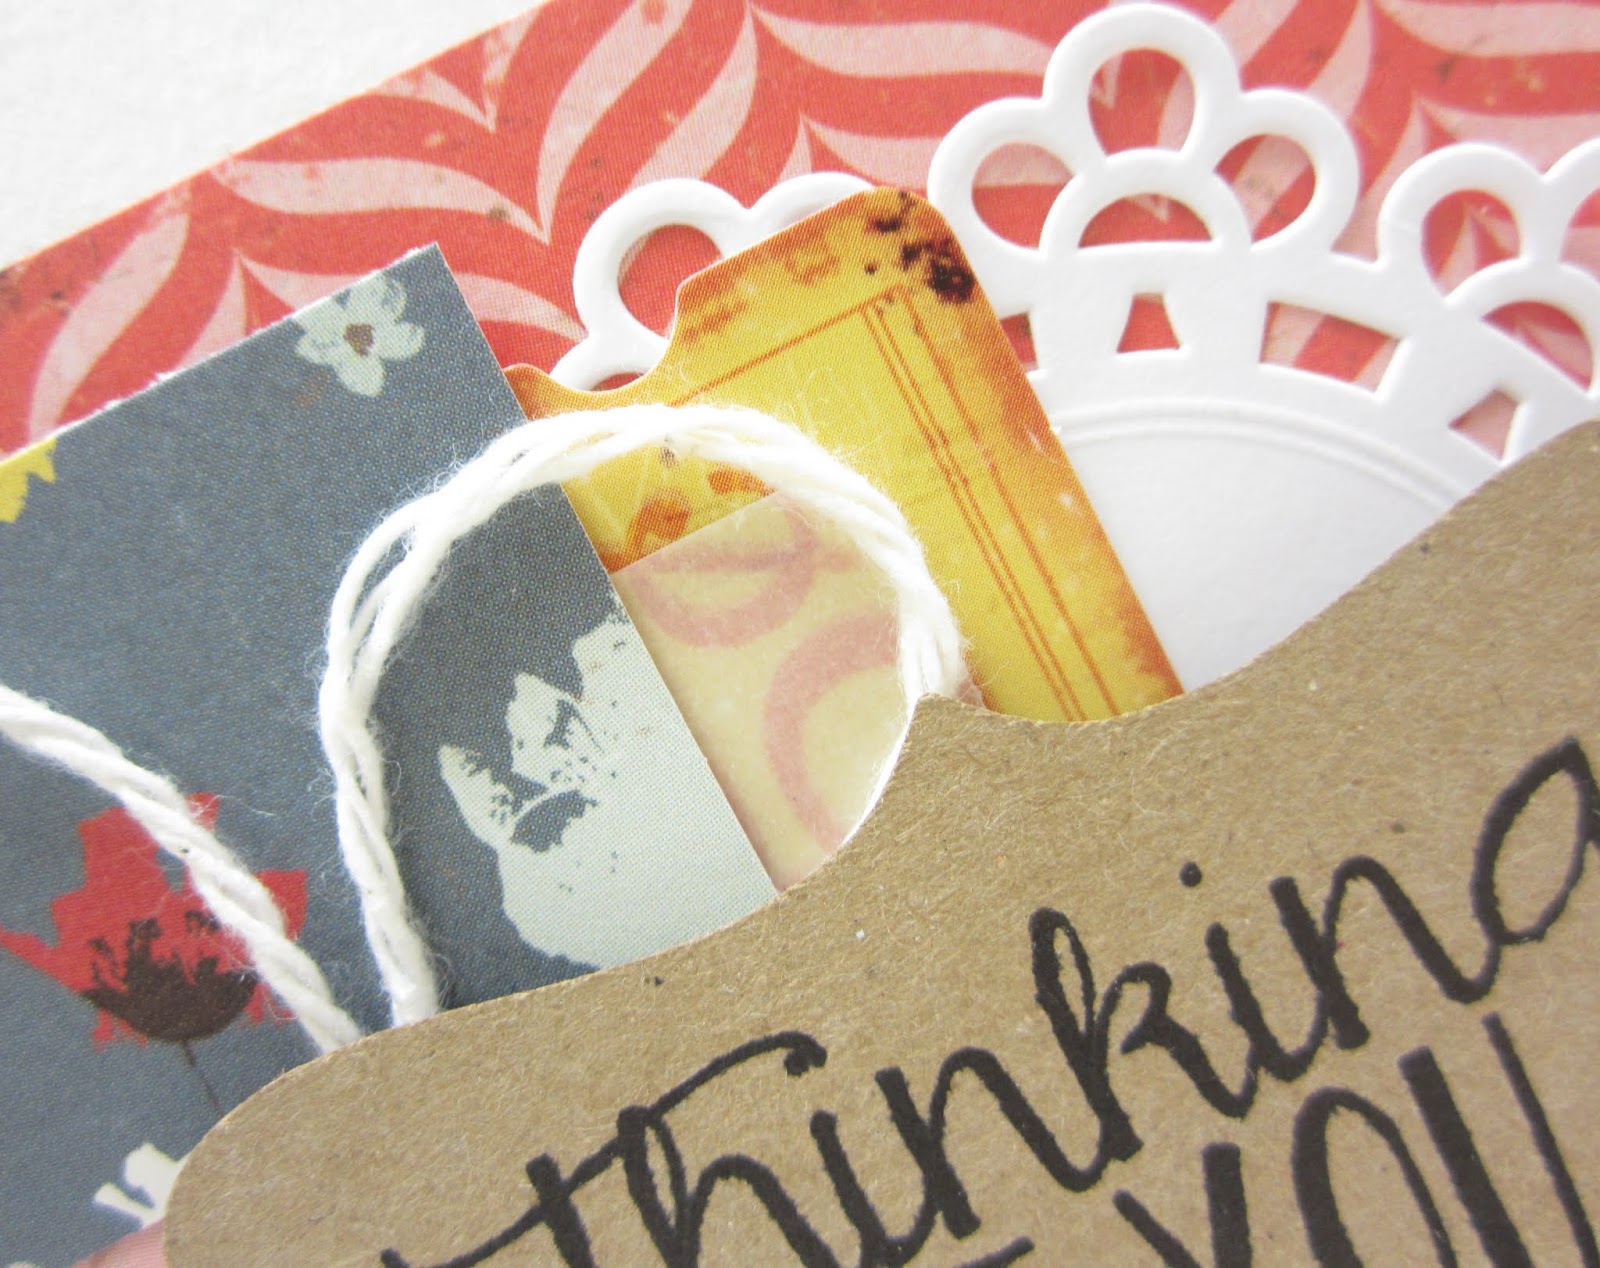
Today I'm sharing a simple card that looks pretty busy, and lets the patterned paper take the spotlight.


I used the popular Happy Stamp and Die cut set, and backed it with some gorgeous patterned paper from Crate Paper.
To help the paper shine, but make sure the die cut could stand out, I used two pieces of vellum to layer behind the die cut and heat embossed sentiment. If you have a thicker vellum, you could just use one layer, but this vellum was rather thin, so I used two layers to make sure it "clouded" out part of the patterned paper enough.


I liked the not perfectly embossed "anniversary" when I made this card (i.e., I was too lazy to do it over), but now I'm starting to rethink that...

Thanks for stopping in today and God bless!

SUPPLIES

Cardstock: Canson
Patterned paper: Crate Paper Maggie Holmes Open Book
Stamp: Hero Arts Happy Stamp and Die cut set
Ink: Versamark
Other: vellum (Darice), embossing powder (Hampton)

Tools: heat gun, Cuttlebug, Hero Arts Happy Stamp and Die Cut die, sewing machine 

9.25.2015

Simple Shaker Cards + VIDEO // Papertrey Ink

It's a doozy today - two cards and a video, playing along with the September Papertrey Ink blog hop! I wanted to show you how I make my shaker cards - no fancy tools, since I don't make shaker cards often enough to warrant purchasing such tools.


For the pocket of the shaker card, I just use a clear packaging envelope and either washi tape or foam tape to seal it up, depending on how thick I want the card to be. I think the pocket would be easier to construct if you did have those fancy tools, but like I said, I simply don't make them often enough to warrant buying said fancy tools.
Anyways, I used Versamarker to color in the leaves of the wreath, for a little extra detail.


So here's take two, with a little more color...


For this card, since I wasn't using the white card base to border the kraft, I wanted to bring in the white somewhere beside just the sentiment. I pulled out my old but trusty white Sakura pen to accomplish the job.


Here's a video showing you how I made the shaker card...


I don't usually make shaker cards, but felt totally inspired after seeing THIS card by Melania Deasy. Man, that girl makes amazing cards - I feel the sudden urge to buy each and every product she uses on a card once I see it.

Thanks so much for stopping in and God bless!

SUPPLIES:

Cardstock: Canson, Papertrey Ink, Bazzill
Stamps: Papetrey Ink Rustic Wreath, Hero Arts Holiday Greetings
Ink: Versamark
Other: sequins (metallic - Darice, other - Avery Elle), embossing powder (Hero Arts), Sakura white gel pen, clear acetate

Tools: heat gun, Cuttlebug, Papertrey Ink Woodgrain impression plate

9.24.2015

Stenciled Background // Hero Arts

I'm blogging over at Hero Arts today, showcasing my first card using stencils! I know, it took me forever to join the bandwagon, and I honestly would've been too scared too if Libby hadn't challenged me to. ;)


Check out the Hero Arts blog for more details, and thanks for stopping in today!

Scrappy Card // Throwback Thursday

Today's card was published in an old issue of Paper Crafts and Scrapbooking magazine.

************************************************************

All the patterned paper on this card came from the scrap envelope, and none of them were trimmed at all to fit the card...though I guess you could tell from the overall messiness, couldn't you? ;)
Whatevs. I was in a messy mood, so this was nice to get out of my system.


This was so fun to make, and I felt very pleased with myself that I was able to use up the scraps.

Thanks for popping in today!

**************************************
Cardstock: Canson, Hobby Lobby
Patterned paper, die cut and sticker: Crate Paper "Storyteller"
Stamps: Papertrey Ink "Mini Blooms"
Ink: Stazon
Other: pearls (Queen and Co), string (stash), doily (Martha Stewart), sequins (Michaels), nail polish

Tools: heart punch, Cuttlebug, My Favorite Things "Framed Greetings" die

9.22.2015

Border Background // Hero Arts

Hi! Today I wanted to show you how to make a "generic" birthday card - a design that is easily customizable for male or female, or you could even change it for an entirely different occasion!


For the background of the card, I used the Hero Arts Sparkle Border stamp set - this is a Christmas stamp set, but the borders are so versatile that you could use them for pretty much any occasion!...(except for maybe sympathy cards - I don't know how well garlands would fit for that theme)
Just change up the colors or even the actual border, and oila! Almost-any-occasion card!


I didn't want to detract from the pretty background, so I layered simply with vellum, a happy die cut and embossed sentiment.

That's it! Thanks so much for stopping in today and God bless!

SUPPLIES

Cardstock: Hero Arts Sea Mix Layering Papers
Stamps: Hero Arts Sparkle Borders and Happy Stamp and Cut
Ink: Hero Arts Soft Cantaloupe and Soft GranitePassion Flower and Cornflower
Other: embossing powder (Hero Arts)

Tools: Cuttlebug, Hero Arts Happy Stamp and Cut die, heat tool

9.19.2015

Step Up Your Embossing // Avery Elle

Today's card is all about increasing the versatility of your dry embossing folders and stepping up the embossing with a little extra detail.


I used the fun Love Triangle embossing folder to emboss my background - I love using this folder, because it works with so many different themes and occasions.


To make the background really pop, I loosely colored the triangles using a Versamarker - I only colored the outside triangles, since the ones in the center were covered up by the piece of fabric.


I promise this will be my last card using the fawn from Storybook for at least a month. As for the other adorable images in the stamp set, I make no such promises. ;)

This card is for the AEI{heart}U non-white card base challenge and the Simon Says Stamp Monday favorite technique challenge (I went with embossing).

Thanks so much for stopping in and have a beautiful day!

SUPPLIES

Cardstock: Papertrey Ink
Stamps: Avery Elle "Storybook"
Ink: Versamark, Tim Holtz
Other: fabric swatch (SEI), gold and white embossing powder (Hampton Arts), clothespin (Darice), patterned paper scraps

Tools: Cuttlebug, Avery Elle Storybook die set, Cuttlebug Love Triangle embossing folder, heat gun, Papertrey Ink Tiny Tags die

9.18.2015

Inlaid Die Cutting // Simon Says Stamp STAMPtember and Hero Arts exclusive


I'm stopping in with a video and two cards today showcasing a beautiful stamp collaboration between Hero Arts and Simon Says Stamp.


Gah, while this card was so fun to make, it was the darnedest thing to photograph.


But for reals, terrible photographs aside, isn't this stamp/die set just gorgeous?!
Here's a video to show you how I made my card (and how I fixed a little boo-boo)


As I mention in the video, this second card was actually my first test run, but I wasn't crazy about the stamping at first.
At first.
Then I decided I didn't want to waste it, so I worked it out eventually...


I used two cute mini stamp sets by Lia for Hero Arts to do the leaves on both cards - Elves and Build a Wreath. Great bang for your buck in these little mini sets from Lia.


Thanks so much for stopping in today and God bless!

SUPPLIES

Cardstock: Bazzill Walnut Cream, Hero Arts Floral Layering paper, Michaels
Stamps: Hero Arts & Simon Says Stamp Prayers, Hero Arts Elves by Lia, Build a Wreath by Lia and Color Layering Christmas Tree
Ink: Versamark, Hero Arts Charcoal, Dark Quartz and Passion Flower
Other: embossing powder (Hero Arts)

Tools: Cuttlebug, Lawn Fawn Border die, Simon Says Stamp hearts dies, Hero Arts and Simon Says Stamp Prayers die

9.17.2015

Watercolored Embossing // Throwback Thursday

I was just testing out a technique on some watercolor cardstock, and instead of scrapping it, I decided to use  it on a card.


Thanks for stopping in today and God bless!

*******************************
Cardstock: Canson
Stamps: Papertrey Ink "Happy Trails" and "Year of Flowers"
Ink: Stazon, Versamark
Other: gems (Michaels), vellum (Hobby Lobby), embossing powder (Hampton Art), patterned paper (stash)

Tools: Cuttlebug, My Favorite Things "Butterflies" die, Martha Stewart butterfly punch, heat gun

9.15.2015

Background Stamping // Hero Arts

Just popping in today with a fresh, zesty card!

I've been waiting to use the Stamp Your Own Fruit set for awhile now, and jumped at the chance when I had some free time a while back.


For the background, I stamped the lemon, masking off the sentiment. I used the same technique, generation stamping, that I did with THIS video post.
To add a little interest to the lemons, I stamped a few scattered dots (to mimic the dotty surface of a real lemon) using one of the layering stamping from the Color Layering Fall Trees.


I stamped and heat embossed the lemon image on black cardstock to make sure it popped off the card. For the border, some glitter tape added some nice interest, and the kraft strip was stamped using the Candy Stripe Bold Prints. I love using Christmas stamp sets for non-Christmas cards, and this candy stripe background could really work with any occasion!

The card was topped off with some twine and gems to finish everything off.

Thanks so much for stopping in today and God bless!

SUPPLIES

Cardstock: Snow Layering papers, Kraft paper
Stamps: Hero Arts "Stamp Your Own Fruit", "Candy Stripe Bold Prints" and "Color Layering Fall  Trees"
Ink: Hero Arts Lemon Yellow, Versamark
Other: glitter tape (American Crafts), embossing powder (Hero Arts), gems (Hero Arts), twine (Darice)

Tools: heat gun 

9.11.2015

Hero Arts Launch Party blog hop winner

You guys are awesome.
Like, really.

If you want to find the official winners for the blog hop, check out this post HERE.
For my own personal giveaway, I used random.org, and according to it, the randomly selected winner is...506, and that is Helen Gullet!
Helen, I'm going to try to reach you, but in case I can't get through for whatever reason, you can always e-mail me at ctprezzia15{at}gmail.com

Seriously, I appreciated each and every comment everyone left, and even though I know it was for a hop and prizes, I still appreciated it a LOT.
Thanks. :)

9.10.2015

Enjoy Your Day // Throwback Thursday

This card was inspired by a shirt my friend was wearing near the end of last spring semester - I would show you the pic I took, but my old phone is terrible at taking pictures and it didn't turn out very clear.


Thanks so much for stopping in today and God bless! 

******************************************
Cardstock: Stathamorre
Stamps: Papertrey Ink "The Sweet Life" and "Mini Blooms"
Ink: Papertrey Ink
Other: gems (Michaels), vellum (Hobby Lobby)

Tools: Cuttlebug, Papertrey Ink "The Sweet Life" dies

9.07.2015

Generation Stamping // Hero Arts + video

Hiya peeps! I'm over on the Hero Arts blog today, with not only my first ever official blog post for Hero Arts, but also my first video!! Agh! I was so nervous, and I am not going to tell you how long I spent agonizing doing the voiceover until I chucked caution to the wind and gave it a last go before bed (it was a school night).
I'm not sure if I'm regretting my chucking now, but anyways, if you want to see/hear what I'm talking about, pop on over to the Hero Arts blog.
Oh, and I don't just jabber like a goofball in the post - I actually have a card there too, which might interest you.


SUPPLIES

Cardstock: Floral Mix Layering Papers (purple), Snow Layering Papers (white), kraft paper
Stamps: Branches Bold Prints (background), Woodland Set by Lia (fox), Kelly's Holiday Planner Icons (leaf image), Color Layering Fall Trees (sentiment)
Ink: Hero Hues Metallic Cubes 4-Pack, Field Notes (Passion Flower), Garden (Soft Cantaloupe), Early Spring (Lemon Yellow)
Other: Sunshine Mixed Accents (pearls), glitter tape (American Crafts)

9.04.2015

Hero Arts Launch Party Blog Hop

Hello everyone, I'm part of an amazing hop today - the Hero Arts Launch Party Blog Hop! You should have arrived here from Nichol Magourik's blog, but if you didn't, no worries! The full line-up is listed at the bottom of this post, so you can start from there.


Today I'm sharing a card and video showing how I get smooth impressions from the awesome ombre ink pads.


...and the how-to;


Basically, when I use the ombre ink pads, not only do I do the little stamp "dance" recommended on the Hero Arts website (which is moving your stamp up and down the pad to get a more even ombre look), but I really ink up my stamp.
Like, really ink it.
I press my stamp pretty firmly against the ink pad until I'm sure it's completely covered with ink, then I lightly tap it against the ink pad to even out the ink and prevent the ink from pooling on any particular spot on the stamp.


Okay, now it's time to gush about the Deck the Halls by Lia stamp set - this is a tiny stamp set, but man, it really gives you bang for your buck! There's a beautiful sentiment, and then these two classic deer images which are not limited to Christmas or holiday cards - think how pretty they'd be in a spring scene!


Now, the whole deal about this hop - the new Hero Arts website!
Like I mentioned before, the new website is amazing - Lisa and the rest of the Hero Arts team really outdid themselves! But not only does it look amazing, but for a limited time, you can get a cute little rocket stamp set included free with any order (ETA - this sold out quick! you guys are awesome) Oh, and shipping is free on US orders of $50 or more, no code needed (which is pretty sweet)

BLOG HOP

Hero Arts will be giving away one GRAND PRIZE $100 Hero Arts shopping spree. The winner will be randomly chosen from all of the blog hop comments received by 11:59pm PST on Tuesday, September 8th. Check the Hero Arts blog for the announcement of the winner.

Now, for the blog hop list;


Thanks so much for stopping in, and now pop on over to the amazing Lucy Abram's blog to continue the hop fun!

GIVEAWAY

I'll be giving one random commenter here a little goodie pack of my own, which will include some of the new goodies from the new Holiday catalog from Hero Arts. :)

9.01.2015

Launch Party // Hero Arts

Hi all, I'm quickly popping in today for a...


Woohoo! Lisa has done an absolutely stunning job with the new site - it looks absolutely gorgeous!!
Some cool stuff of this new site;

  • the website has a new look & feel, which a much improved store interface
  • Hero Arts is offering free shipping on all US orders of $50 of more, AND they are giving away a free stamp set with all orders, while supplies last
  • the holiday products are now available on heroarts.com

Now that you got the deets, here's a card....


I did a little bit of watercoloring on the wooden tag using the Hero Arts Past Times stamp set (excellent for making masculine cards). The water will really spread across the wood, so if you try some watercoloring on wooden tags or paper (well, I guess technically all paper is wooden, but you catch my drift), give the image a little gimme room for the water to spread out. So basically, don't color right up to the lines - the water will take care of that for you. ;)

Thanks so much for stopping in and ENJOY the new website!! :)

SUPPLIES

Cardstock: Canson
Patterned paper: Crate Paper "DIY Shop"
Stamps: Hero Arts "Past Times"
Ink: Stazon
Other: vellum, washi tape, twine, wooden tag

Tools: Cuttlebug, My Favorite Things Framed Greetings die, Papertrey Ink Wet Paint die