2.23.2016

Threadless Stitched Border Birthday // Lawn Fawn

I'm going through my last midterms ever right now, so today's post is a quickie...


I wanted to see how the robot would stamp and color on fabric, so I played with that. Then I colored a Studio Calico wooden die cut, and made a custom "ticket" to settle the image and sentiment on.
For the border, I simply stitched the cardstock without using thread - this is one way to get that punched/dotted look that a lot of dies have.


This card is for the Lawnscaping Celebration #124 challenge.


Thanks so much for stopping in and God bless!

SUPPLIES


Cardstock: Canson
Patterned paper: Crate Paper
Stamps: Lawn Fawn Beep Boop Birthday
Ink: Stazon, Versamark
Other: wood veneer (Studio Calico), fabric (stash)

Tools: sewing machine, Cuttlebug, Lawn Fawn Beep Boop Birthday dies

2.17.2016

Die Cut Border Card Set // Avery Elle

I have a fun card set to share with you today, the result of trying to make one unblemished card.

This first card is actually the last card I made, the one look that I was going for.


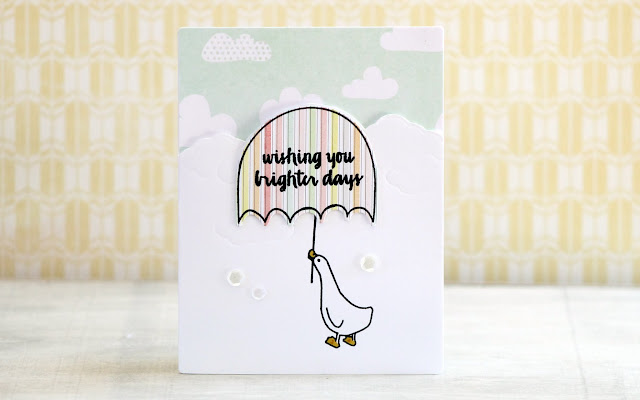
However, I didn't want my cutting and embossing on the previous cards to go to waste, so with some creative layering (i.e. vellum clouds, sequins), I was able to finish the first three.


I took the clouds from the Weather It stamp set coordinating dies, and embossed them into the card base using a Spellbinders tan mat. I then cut around the clouds, getting a sort of window card? Hm, not exactly sure what you'd call this kind of card...;)
I was inspired by the look of the clouds in THIS pin. Embossing with your dies is a great way to get some more use out of dies. 


Of course, THIS little goose was just dying to use THIS umbrella.


They all have such different looks, despite having the same layout. Which one is your favorite? I think I might like the last one best.
This was such a fun way to use up some more patterned paper - I can't even believe how little I use it these days!
This is for the AEI{heart}U Friendship challenge (click on the badge to go to the challenge)


For a chance to win a $30 Altenew gift card, please visit THIS post.
Thanks so much for stopping in and God bless!

SUPPLIES


Cardstock: Michaels
Patterned paper: American Crafts Crate Paper and Dear Lizzy
Stamps: Avery Elle Storybook and Weather It
Ink: Versafine, Tim Holtz
Other: enamel dots (My Minds Eye), sequins (Avery Elle), vellum

Tools: Cuttlebug, Avery Elle Weather It and Storybook dies

2.15.2016

Watercolored Vellum Wreath + VIDEO + GIVEAWAY // Altenew

Hey all! Today I have another card using vellum (I can't seem to stop!) and a video! To see my Hero Arts post, go HERE.

I knew as soon as I laid eyes on the Doodle Blooms stamp set that I had to make a wreath with those delicate leaf images! And of course, I had to gold emboss them, and do it on vellum - one thing led to another, and this card was "born" and filmed in the space of about thirty minutes! Unfortunately, it took me a lot longer to narrate it, since my one year old niece and three year old nephew are visiting, so the house is hardly quiet. ;)


The how-to video...

If you are having problems viewing this video, please try watching it HERE on YouTube.

Gah! I really need to cut back on the vellum! But seriously, how pretty are these images embossed, colored and die cut? Because seriously, if you're considering this stamp set (which you definitely should be), the dies are pretty much a must. It makes creating light, fluffy cards so much easier and so much more fun.


I stamped the background with the leaf images, and embossed a sentiment from Beautiful Day to complete the card.


Thanks to Nicole and Altenew for this opportunity - I had so much fun! Though I was a teeny bit nervous creating a video for something other than my own entertainment (as I always am ;)).


For all the details on this fun video challenge, and a chance to be the next guest designer for the Altenew video challenges, go HERE.

Because I love this company and their stamps so much, and to thank you for stopping in, I'm giving away a $30 gift card to Altenew. You have three ways of entering, for a total of three entries:
Just leave a comment on this blog post, the YouTube video, and THIS Instagram post.

This giveaway ends 2/28.

Thanks so much for stopping in and God bless!

SUPPLIES


Cardstock: Canson Bristol
Stamps: Altenew Beautiful Day and Doodle Blooms
Ink: Tim Holtz, Versamark
Other: embossing powder (Hampton Arts - gold, Hero Arts - gold)

Tools: paint brush, water, Cuttlebug, Altenew Doodle Blooms dies, heat gun

Sympathy Card Set + VIDEO // Hero Arts

I'm over on the Hero Arts blog today, with a video showing how to make this card set...


I'd love it if you'd take a minute to check it out! Thanks for stopping in today and God bless!

2.14.2016

Tone-on-tone Valentine // Hero Arts

Happy St. Valentines Day! I apologize ahead of time for the barrage of posts you'll be getting in the next few days - hopefully you'll enjoy. ;)


This card was kinda tricky to photograph - the pink wanted to be kind of obnoxious. I think I'll send it to my older sister - she loves that kind of pink. ;)


Thanks for stopping in today and God bless! Enjoy your Sunday!

SUPPLIES


Cardstock: Hero Arts Blush Mix Folded cards
Stamps: Hero Arts Color Layering For You Flowers and Heart Vine
Ink: Hero Arts Ultra Pink, Black and Mint Julep
Other: Hero Arts Earth Mixed Accents, vellum, ribbon

2.13.2016

Quick Valentine Set // Hero Arts

Today I want to share a quick set of Valentines that I whipped up real quick yesterday for friends. These are so easy to make, quick and they work well for both genders!


This Hipster Animal set is SO fun! I love "dressing up" the animals, and they will be perfect for quick birthday cards, for boys and girls! This stamp set is available at your favorite online stamping store, as well as the Hero Arts store.
Now for a closer look at each individually...


This sentiment actually said "hoppy birthday", but I just made sure not to ink the "birth" part, and it worked for the Valentine.


I die cut tags to go behind the main panel, and you could leave them like that and write a note on the back. However, I wanted them to be little cards, so I cut smaller card bases, and when I went to die cut them, I made sure the die didn't cover them entirely - the left edge of the die didn't touch the cardstock, so when I ran it through my machine, it didn't cut the left edge (the fold of the card)


These cards were a quick use of some larger scraps of patterned paper.


The owl and the bunny are my favorites - what are yours?

I hope you enjoyed these Valentines, and I hope you have a happy St. Valentine's Day! Thanks for stopping in and God bless!

SUPPLIES


Cardstock: Canson Bristol, DWCV (black)
Patterned paper: Crate Paper (assorted collections)
Stamps: Hero Arts Hipster Animals
Ink: Versamark, Hero Arts Clearly Kelly Urban Inks (grey), Black and Strawberry
Other: embossing powder (Hero Arts)

Tools: heat gun, Cuttlebug, My Favorite Things Pierced Rectangle dies, Paper Smooches Quote Tag die

2.08.2016

Hero Arts 2016 Catalog Blog Hop + VIDEO

Hello everyone, I'm part of an amazing hop today - the Hero Arts 2016 Catalog Blog Hop! You should have arrived here from Wanda Guess' blog, but if you didn't, no worries! The full line-up is listed at the bottom of this post, so you can start from there. We are celebrating the release of the new products in the Hero Arts store. They're also available at your favorite retailers, online and in store!


I have a video and two cards for you today, showing off the fabulous new Color Layering For You stamp set, with some tips on how to get crisp impressions on vellum. 


And the how to...

If you are having problems viewing this video, please try watching it HERE on YouTube.

Mmmm, peach and mint - my all time favorite color combo! I stamped the background in the new Confetti Bold Prints in Mint Julep. I know this background is going to become a favorite, it's just so versatile! If you're not sick of making winter cards yet, it would be perfect for snow!


For both cards, I stamped the sentiment from the Love by Lia stamp set. The brush script of this sentiment is so gorgeous!


This card was so hard to photograph, but really showcases the stamping on the vellum. Are you ready for my top secret tip on getting crisp impressions on vellum?
Here it is...
Ink up your image, then wave it back and forth in the air like a crazy woman, about 15-20 times, depending on how juicy your ink pad is.
This "airing out" of the stamp helps the ink dry a little on the stamp (not harming the stamp), and makes it easier to stamp on the vellum, since it's not quite so slick.


You could totally stamp the second layers of these images, but I decided I liked the bold look of this.

GIVEAWAY


Hero Arts is giving away four $25 shopping sprees, drawn from comments left across all blogs in the hop. Comment by 11:59pm PT on Sunday, February 14, and we'll announce the winner on the Hero Arts blog the following week. Hop along and comment for more chances to win!

BLOG HOP


Clare Prezzia (you are here!) 

Thanks so much for stopping in! Now pop on over to Tami Hartley, and enjoy the rest of the hop! God bless!

SUPPLIES


Cardstock: Hero Arts Pool Layering paper
Stamps: Hero Arts Color Layering For You, Confetti Bold Prints and Love by Lia
Ink: Hero Arts Black, Fresh Peach, Mint Julep and Strawberry
Other: sequins (Lucy Abrams), vellum (Joann Fabrics)

Tools: heat gun, Cuttlebug, Hero Arts Color Layering For You frame cuts, My Favorite Things Stitched Rectangles die

2.06.2016

Flying Dog // My Favorite Things

Today I'm popping in with a fun shaker card for the MFT Color Challenge #38 and the Simon Says Stamp Monday Challenge (Ray of Sunshine).


To start off, I blended a background for the two pink colors in the challenge, using some Distress Inks. I made it a shaker using some Martha Stewart star confetti, and Darice sequins.
Making shaker cards with My Favorite Things stamps has definitely become a thing for me recently. I'm not exactly sure why, but I'm totally blaming Melania Deasy. ;)


The rest of the card finished simply off with an adorable colored pup, a bunch of balloons (created from the one balloon in THIS cute stamp set), string, an embossed sentiment and vellum clouds.

I colored the dog with my Zig's, and for the balloons, I only had a rather bright shade of yellow. To tone it down and get a gradient look, I used my Wink of Stella pen to blend it out, which had the added bonus of adding some nice shimmer. The Zig's actually blend really well with the Michael's brand cardstock (which is also nice and heavy, at 110 lb) - at least, their newer cardstock.

I found some cardstock I bought this past summer noticeably different from cardstock I bought in December. The older, summer cardstock was a little creamier in tone (which I prefer), but was kinda horrible when it came to coloring. The more recent cardstock is dreamy with Zig's, and more pasty white.
I'm playing along with the fun 30 Day Coloring Challenge.

Thanks so much for stopping in today and God bless!

SUPPLIES


Cardstock: Michaels
Stamps: My Favorite Things Top Dog and Birthday Bears
Ink: Distress Ink, Versafine
Other: sequins (Darice), confetti (Martha Stewart), vellum and string (stash), Zig Clean Color brushes

Tools: Cuttlebug, My Favorite Things Top Dog die, Avery Elle Double Pierced Rectangles die, Paper Smooches Quote Tag die


2.01.2016

Hello Gorgeous! // Hero Arts

There's a new challenge over at the Hero Arts blog!


How easy is this?!
Here's a card I made for the new catalog, using the brand new and lovely Antique Rose Stem and Hello Gorgeous stamps. These stamps will be available in a week, February 8th!


I stamped the flower in Soft Pink, and covered a small strip of cardstock with the same ink, to adhere to the bottom of the color.


I love this sentiment - the font is gorgeous, and it's going to be so fun to send out cards with this sentiment.
I also stamped a strip of vellum with the Candy Stripe Bold Prints background, and then breached the gap between the two strips with some gold glitter tape.

Thanks so much for stopping in today, and I hope you'll play along with the challenge!

SUPPLIES


Cardstock: Hero Arts Snow Layering papers
Stamps: Hero Arts Antique Rose Stem, Hello Gorgeous and Candy Stripe Bold Prints
Ink: Hero Arts Black and Soft Pink
Other: vellum, glitter tape (American Crafts), gems (Hero Arts - Neutral Mixed Accents)